When photographing a waterfall (or other forms of moving, turbulent water), the choice of shutter speed determines whether you get a stop-action view of every droplet in motion, or whether you get a smooth, time-averaged view of the currents. What is the best shutter speed to use with waterfalls? I had the opportunity last year to do an experiment, an attempt to answer that question. Of course, there is no single “best” shutter speed. It is a mater of taste and creative vision. But the experiment was useful nonetheless, since it resulted in a visual catalog of how a waterfall looks over a thousand-fold range of shutter speeds.
These pictures were all taken at Niagara Falls, with a Pentax K-7 DSLR, with a Tamron 28-75mm zoom lens at 28mm. There are 21 shots, taken at 1/2 stop shutter speed increments, from 1/6000th of a second to 1/6th of a second. In order to ensure the same exposures while varying the shutter speed I made compensatory adjustments to the aperture and the ISO settings. (With a neutral density filter one could extend this to shutter speeds 2-stops slower.) Post-processing was limited to white balance and cropping.
So what did this tell me? With shutter speed down to around 1/60th of a second, the waterfall looks pretty much the same. From there down to 1/20th of a second you get gradual softening, and at the slowest shutter speeds you get effects ranging from painterly to otherworldly. My favorite is 1/10th of a second.
I suspect the important factors here are:
- The speed of the water
- The distance of the camera from the water
- The focal length of the lens
These combine to determine, from the perspective of the camera sensor, the speed at which the water’s image moves, in pixels/second. If the image is moving at 1 pixel/second, then shutter speeds faster than 1 second will show no blur. But a shutter speed of 15 seconds will show a blur over 15 pixels. I bet if I took the original 1/6000 second shot, loaded it in Photoshop and applied a motion blur until it looked as close as possible to the water in the 1/6 second exposure, I could work backwards to determine the speed of the water.
| Shutter Speed | Photograph |
|---|---|
| 1/6000 second | 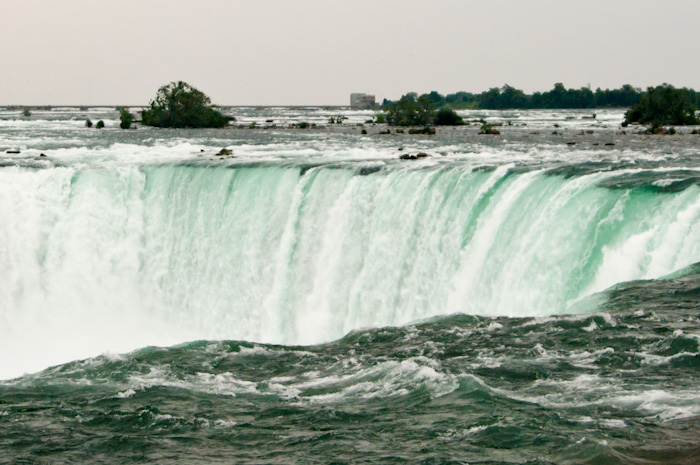 |
| 1/4000 second |  |
| 1/3000 second | 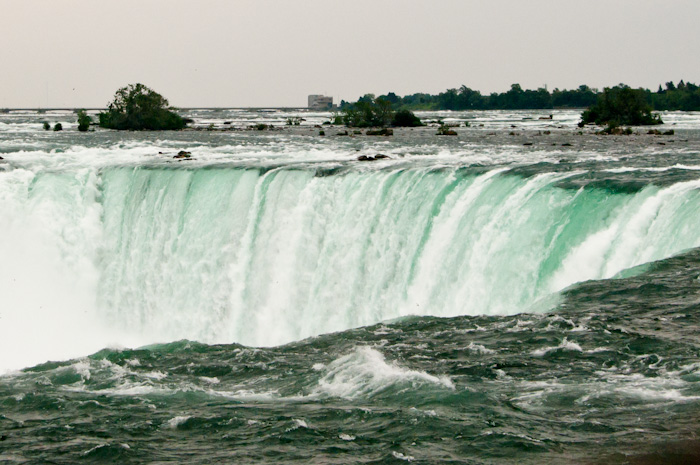 |
| 1/2000 second |  |
| 1/1500 second |  |
| 1/1000 second |  |
| 1/750 second |  |
| 1/500 second |  |
| 1/350 second |  |
| 1/250 second |  |
| 1/180 second |  |
| 1/125 second |  |
| 1/90 second | 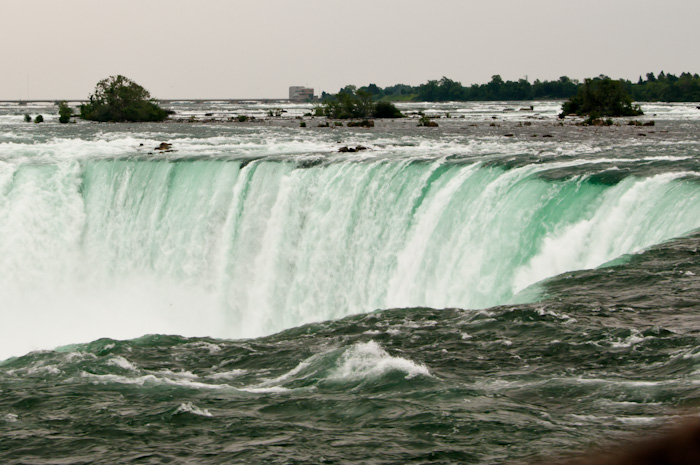 |
| 1/60 second |  |
| 1/45 second | 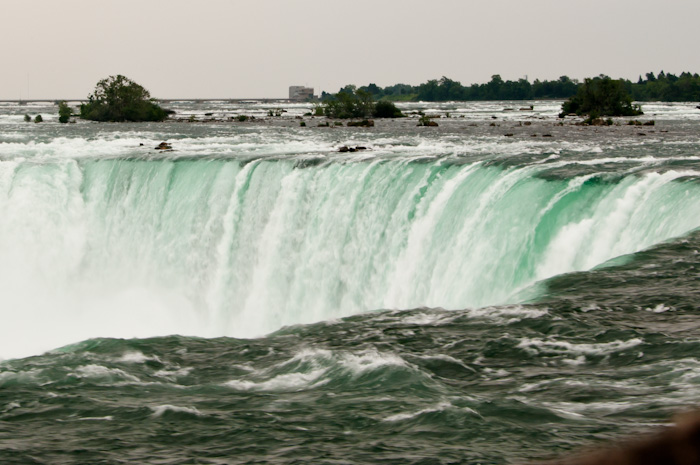 |
| 1/30 second |  |
| 1/20 second | 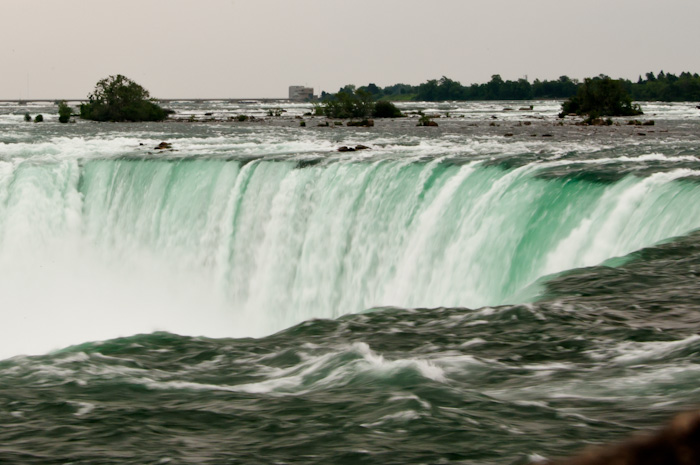 |
| 1/15 second |  |
| 1/10 second |  |
| 1/8 second |  |
| 1/6 second | 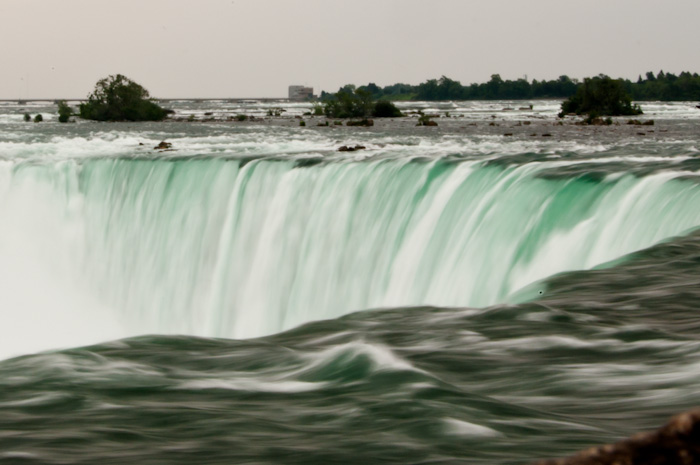 |